Logging Into login.bg.discoverer.bg (CPU cluster, from BG Academic IP Networks)
About
Important
This document explains how to access the login node of Discoverer HPC without establishing VPN Access to the SSH server on the CPU cluster login node.
If your desktop system or SSH jump server is connected to any of the Bulgarian academic/research networks, it can be possible to access the Dicoverer HPC login node directly, without establishing a VPN tunnel to the Discoverer HPC internal network. That opportunity is provided based on checking the IPv4 address affiliation and does not cover your home desktop systems.
In case you need SSH access to the Dicoverer HPC login node from your home desktop, then you should either establish VPN Access to the SSH server on the CPU cluster login node or use SSH jump server hosted on one of the Bulgarian academic/research networks.
How it works
Instead of connecting to login.discoverer.bg at port 22/tcp (that is the case with VPN Access to the SSH server on the CPU cluster login node), you should point your SSH client to login.bg.discoverer.bg at port 2222/tcp (mind ‘bg’ in the host name). Installed on login.bg.discoverer.bg is a firewall that restricts the connections to port 2222/tcp. It passes through only SSH connections initiated from IPv4 addresses affiliated to the Bulgarian academic/research network.
Prerequisites
To be able to access the login, node you should have:
Valid and active Discoverer HPC account (see Onboarding guide)
SSH client installed and SSH key-pair generated and stored (see SSH Access)
(optional) SSH jump server, if you want to connect using your home desktop
Linux/macOS
Load your private SSH key into the memory (if it is not already loaded there):
ssh-add
Open a terminal and log into login.bg.discoverer.bg:
ssh login.bg.discoverer.bg -l username -p 2222
Upon first time connecting to login.bg.discoverer.bg under the current user profile, the ssh client will rise a warning message and display there the key algorithm, and the key fingerprint value computed for of the server’s SSH key:
The authenticity of host '[login.bg.discoverer.bg]:2222 ([82.119.91.4]:2222)' can't be established.
ED25519 key fingerprint is SHA256:ZCs7jgx3C9N8elFO+SLyBucNKHNG/P4MqqblfVSPk7s.
This key is not known by any other names
Are you sure you want to continue connecting (yes/no/[fingerprint])?
Warning
If the reported fingerprint value is not listed in the document login.discoverer.bg and login.bg.discoverer.bg - Key Fingeprints, do not type “yes”. Type “no” and report the incident to the Discoverer HPC support team - see Getting help and wait for their response.
Windows (PuTTY)
Basic
Start your VPN client and establish a VPN tunnel to the Discoverer HPC internal network. See VPN Access to the SSH server on the CPU cluster login node.
Before running PuTTY, use Pageant to cache your SSH private key into the memory by following the procedure described in Caching Private SSH Keys.
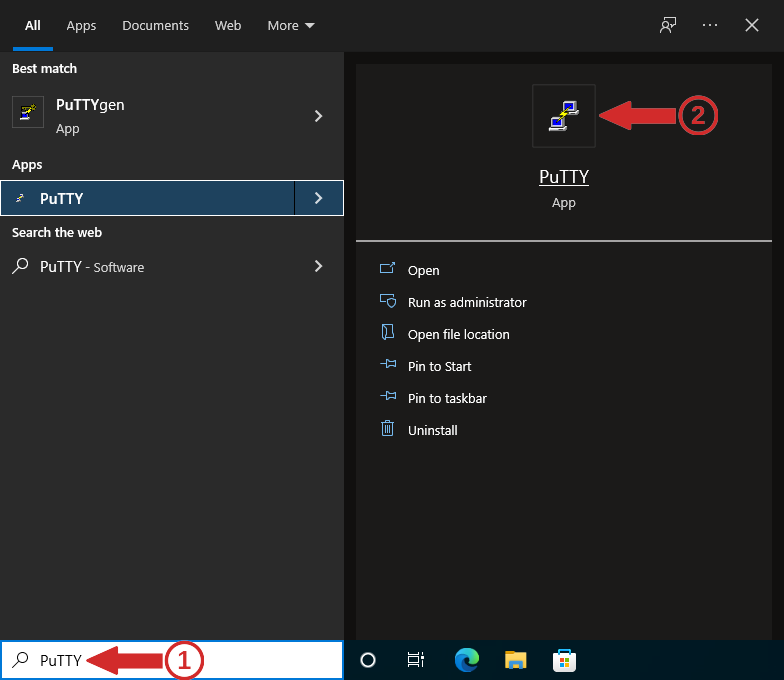
To run PuTTY go to the seach bar of Windows, type there “putty” (1), and click on the application icon (2):
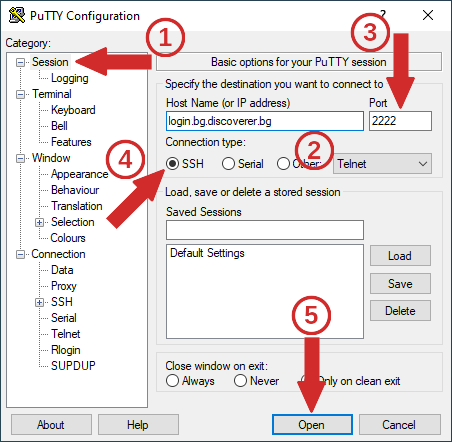
In the window of the application, be sure you are in the secion “Session” (1), then in the text field below “Host Name (or IP address)” type login.bg.discoverer.bg (2), be sure the port number is set 2222 (3), select “SSH” as a connection type (4), and press the button “Open” (5):
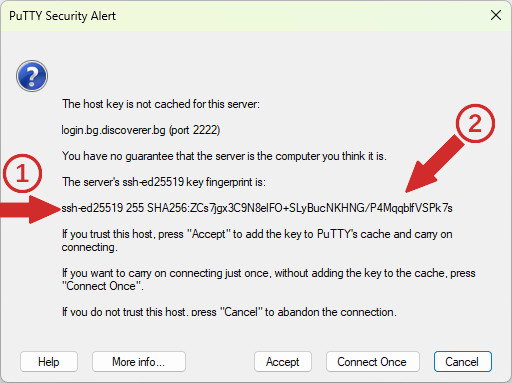
Upon first time connecting to login.bg.discoverer.bg on the current desktop Windows user profile, PuTTY will rise a warning window message and will display there the key algorithm (1) and the key fingerprint value (2) computed for of the server’s SSH key:
Warning
If the reported fingerprint value is not listed in the document login.discoverer.bg and login.bg.discoverer.bg - Key Fingeprints, do not press “Accept” or “Connect Once” buttons. Press “Cance” and report the incident to the Discoverer HPC support team - see Getting help and wait for their response.
Then enter your username and press enter:
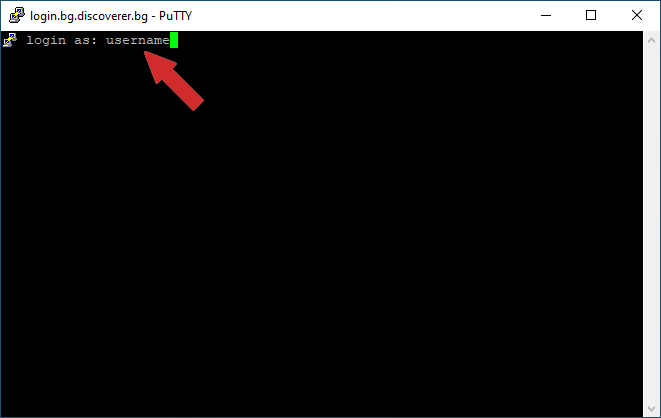
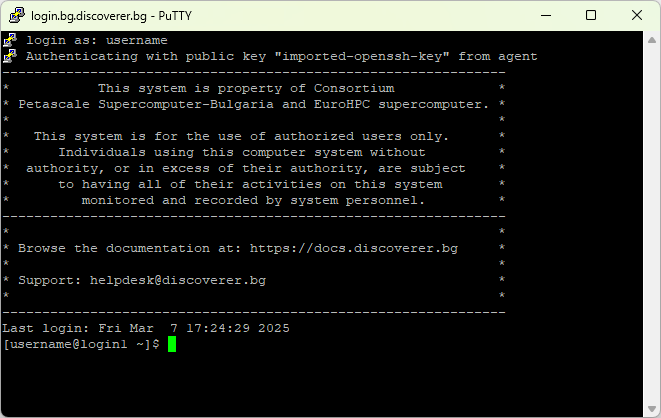
In case of successful login one should see the MOTD message, along with the shell environment command line:
Using a profile of settings
Start your VPN client and establish a VPN tunnel to the Discoverer HPC internal network. See VPN Access to the SSH server on the CPU cluster login node.
Before running PuTTY, use Pageant to cache your SSH private key into the memory by following the procedure described in Caching Private SSH Keys.
You can follow the instructions in Setting up a profile below to create your own PuTTY profile of settings for connecting to login.bg.discoverer.bg.
To run PuTTY go to the seach bar of Windows, type there “putty” (1), and click on the application icon (2):
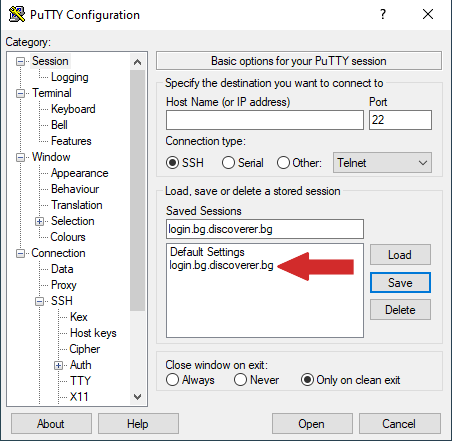
From the list of profiles, select “login.bg.discoverer.bg” by clicking twice on it:
and PuTTY will initiate SSH connection to login.bg.discoverer.bg. In case of successful login one should see the MOTD message, along with the shell environment command line:
Setting up a profile
Run PuTTY by typing “putty” (1) in the Windows search bar, and click on the application icon (2):
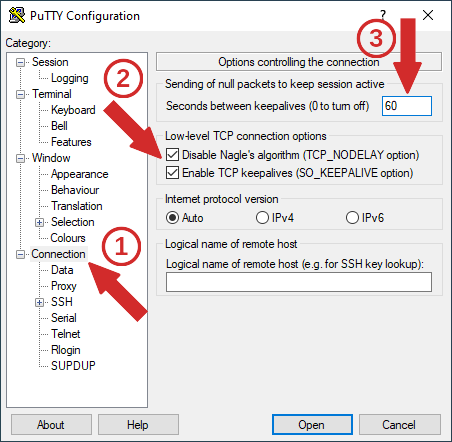
In the left plane of the PuTTY window, click on “Connection” (1), mark there (if they are not) “Enable Naggle’s algorithm” and “Enable TCP keepalives” (2), and provide the number of seconds between two consequent keepalive messages (3), which for the example below is 60 seconds:
In “Data” (1) provide your Discoverer HPC username (2):
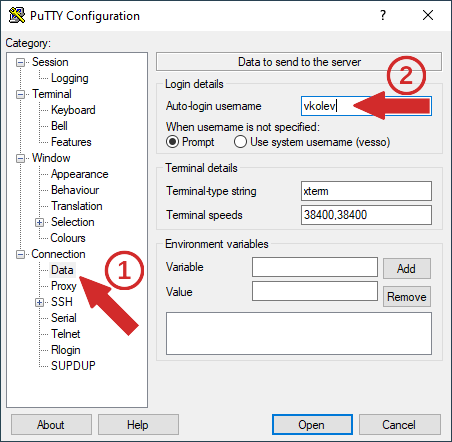
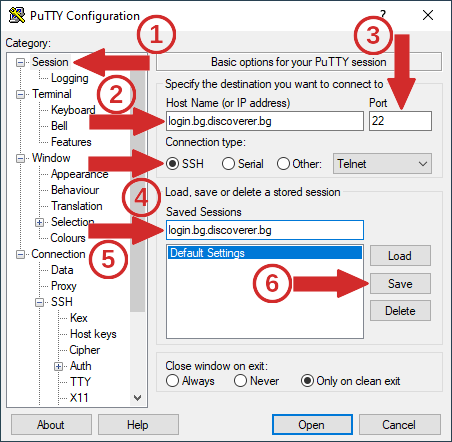
so as it can be automatically provided every time you log into login.bg.discoverer.bg. Finally, to save the profile settings, click on “Session”, type login.bg.discoverer.bg in the text field below “Host Name (and IP address)” (2), specify “2222” as port number (3), select “SSH” as connection type (4), type login.bg.discoverer.bg below “Saved Sessions” (5), and finally press “Save” to save the profile of settings under that name (6):
Getting help
See Getting help